Showing posts with label recipes. Show all posts

11.30.2011

Dining Room Makeover ...

Thought I'd make up for the long blog break with a long post that will take you 2 days to read! This will also explain what I've been busy with the past couple of weeks - when we weren't spending a week in Orlando doing the Disney thing! :) 

So the make over started when we inherited this buffet [below]. We did what I call "Musical Dressers" - sort of like "Musical Chairs", but with dressers: this one goes here, this one goes there, that will go there ... and that [changing table / dresser] will get listed on Craigslist & sold that same morning to a lovely couple who will turn it into a TV cabinet! :)

We got the buffet from Kyle's parents. The storage was great, we had space in our dining room for it, but the finish wouldn't work. It was way too formal for my dining room and for my personal taste. It was cherry & glossy. We are not a formal family & we have a unique set up for a dining room ... it is an extension of the kitchen. It is where we eat daily - not just on holidays. It is also where we do puzzles, do homework & carve pumpkins. In other words, this room has to be casual enough for daily use, but fancy enough to host Thanksgiving dinner. 
Buffet before with its cherry finish. If you have an aversion to sanding & painting furniture, you can end here. Otherwise ... continue. :)
Sanding. Lots & lots of sanding. Not a good idea probably if just a week ago you were diagnosed with bronchitis - but I was vigilant with cleaning up the sawdust [see the vacuum?]. A palm sander comes in handy for this part.
Rookie mistake ... I should have primed it. I tried to get out of it. I painted 2-3 good coats before I surrendered & got out the primer. Don't make this mistake. Prime first. As you can see, what was left of the stain bled through.
Then paint. I did a combo of roll & brush. This is freak-a-zoid Libby sneaking into the photo. She gets her freak-a-zoid-ness mostly from me, but her mad photo-sabotage skills from her daddy. She's the best of both worlds! :)
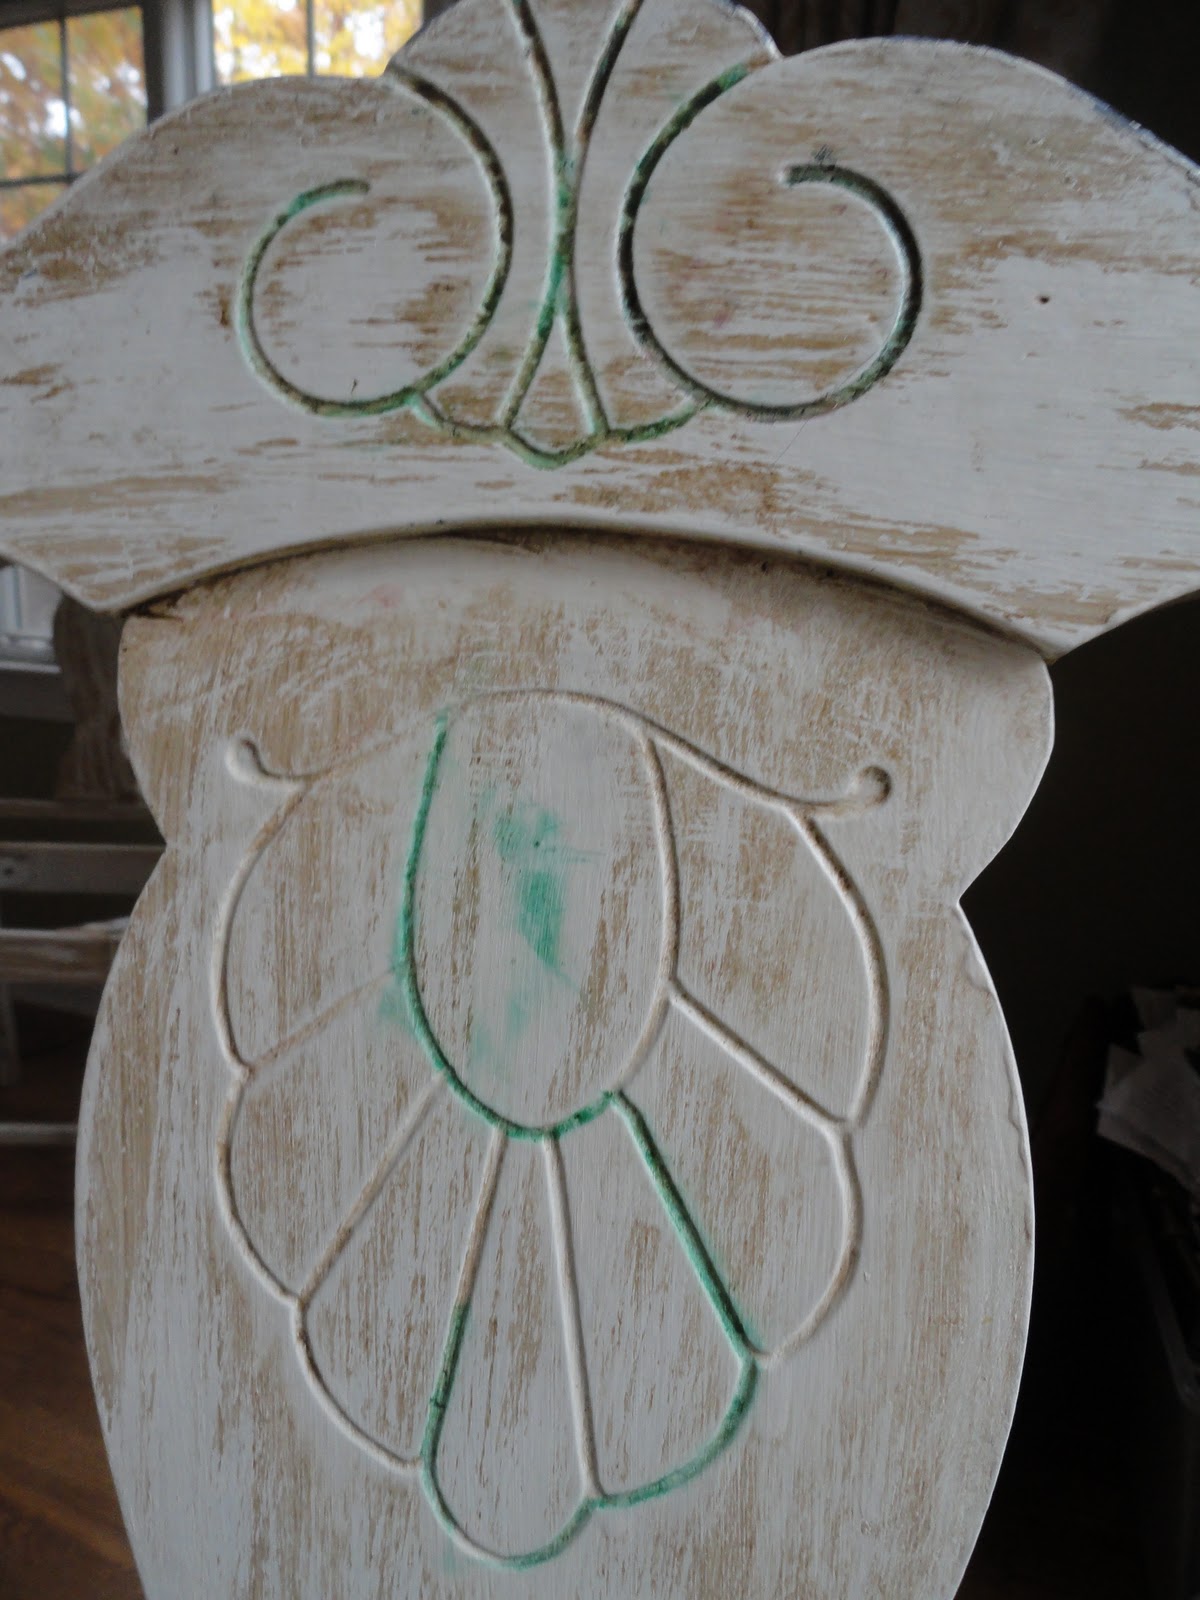
Next up on the redo list were my 6 dining room chairs. They had been painted cream right after I got them, but I had never sanded them. I had just primed & painted over the gloppy country blue. Then when we lived in Corpus Christi our kitchen had a little Spanish style thing going, so just for fun I had rubbed some antiquing glaze on the chairs. Between that & a little freak-a-zoid tracing green marker into the crevices of one of the chairs [see? Told you we're casual], it was time to give them a makeover as well. 
I sanded all 6 chairs down, made repairs where needed, then gave them all a fresh coat before screwing the seats back in.
I left the table for last. It had been painted a few years ago, but I wanted to give it a little more attention this time around. [Two years ago I did this post where I had just painted the table. I also wrote about it here where you can see the before photos of both the table & chairs!] There were a couple cracks that I filled with wood putty, then sanded down before painting.
 Ready for its close-up ... but still had one more thing I wanted to do before putting all my supplies away.
In the background, you'll see Davis who while playing games on my iPhone, was there for [an incredible amount of] moral support. But in the foreground, you'll see a pine board getting prepped. The day I bought this table [summer of ... '02?], I told myself one day I'd make a leaf or 2. Only took me about 9 years to do that project. And to think it only took about an hour & a 1/2 to do it. :) Took my measurements to the hardware store & had them cut down a pine 1"x12"x6' board to the width of the table. It cost me just over $7. I already had a wooden dowel [from other projects] that I had tested out in the already existing holes in the table. I believe it was the 3/4" [diameter] size. 
 The table came with 2 or 3 little pegs [but no leaves, they had been lost ] so I used the originals to make more. 
I made more than I needed just to have a few extra & stored them in a drawer of the buffet. I just used a jigsaw to cut the dowel into approx 1.5" pieces, then sanded down the edges. They aren't perfect, but work perfectly fine!
 Original holes, new pegs!
 This next part made me nervous. Very nervous. I wasn't sure how to make the holes in the accurate spots. At first, I marked the ends of the dowel pegs with blue chalk, to see if they'd leave a perfect circle onto the pine board when butted up next to each other. They didn't. So then I traced it with a pencil, which wasn't perfect either. So I used the combination of pencil & chalk markings to guesstimate where I needed to drill.
 Then held my breath & breathed again when it all fit together like a glove. Awesome. Old table from [we think?] the 1930's with some new accessories made for it in 2011. You just gotta love that.
 Above is a pic of the table with the new leaf in place, all primed & painted. We don't have enough chairs to do this, but if needed, we can squeeze 3 chairs on one side now.
 Finished. Less than 2 days before I hosted a Thanksgiving dinner.
 The leaf helped us to spread out, which I think when it's 6 adults [kiddies had their own table], it's kind of nice to be able to do. Love love love. So so happy. 
 And since that last photo was right next to this one in iphoto, I couldn't help but put this one in of our Thanksgiving turkey [recipe found here]. I love trying out new recipes & thought with 200 reviews, a 5 star rating & a blanket of bacon, it was hard to go wrong. :) Hope you & yours had a wonderful Thanksgiving!

9.15.2011

Carrot Cupcakes ...

It's baking season again. Today it was 49 on our way to school & it's supposed to be HIGH of 61 or so. I am COLD & I am NOT going to complain about it. I am also making these for the 3rd time in 3 weeks. They are SO GOOD. Especially when served fresh out of the oven, with cream cheese frosting swirled on one that's so warm, the frosting slightly melts [a la cinnamon rolls].

I cut this recipe out of Martha Stewart Kids several years ago ... and I have just doubled it so that it makes 18 regular size muffins. I've also added freshly ground flax seed to the batter. Because you might as well throw it in if ya got it.

1 1/2 cups all purpose flour
2 cups shredded carrots
1/2 cup unsweetened applesauce
1/4 cup lemon juice
1 cup sugar
1 tsp baking powder
1 tsp baking soda
1/2 tsp salt
2 tsp ground cinnamon
3/4 cup vegetable oil
 4 eggs, lightly beaten
1/2 cup ground flax seed, optional

1. Heat oven to 350 degrees. In medium bowl combine shredded carrots, applesauce & lemon juice.  

2. In a separate bowl, stir together flour, sugar, baking powder, baking soda, salt & cinnamon. Add oil & eggs; stir until smooth. This is when I add in the flax seed. Add carrot mixture; stir to combine. Spoon batter into prepared muffin pan; bake until tester comes out clean, about 20-25 minutes. 

3. Cool muffins in pans on wire rack 5 minutes. When completely cool, decorate with cream cheese frosting. [Although, like I told you ... I like them warm.]

Now. I just used store bought. The Martha recipe also included one for cream cheese frosting, which I have made before, but if I recall my kids didn't care for it much. Way too "cream cheesy" - which not one of them likes. But that's okay. We can't make all things all the time. I'm just happy to hear the kids cheer when I say they can have carrots & flax seed as an after school snack. :) HA. As if I say that.

4.12.2011

It was an Angry Birdthday ...

[the Angry Peeps that I made]
 [Gift from his grandparents: his favorite, "Bomb Bird"]
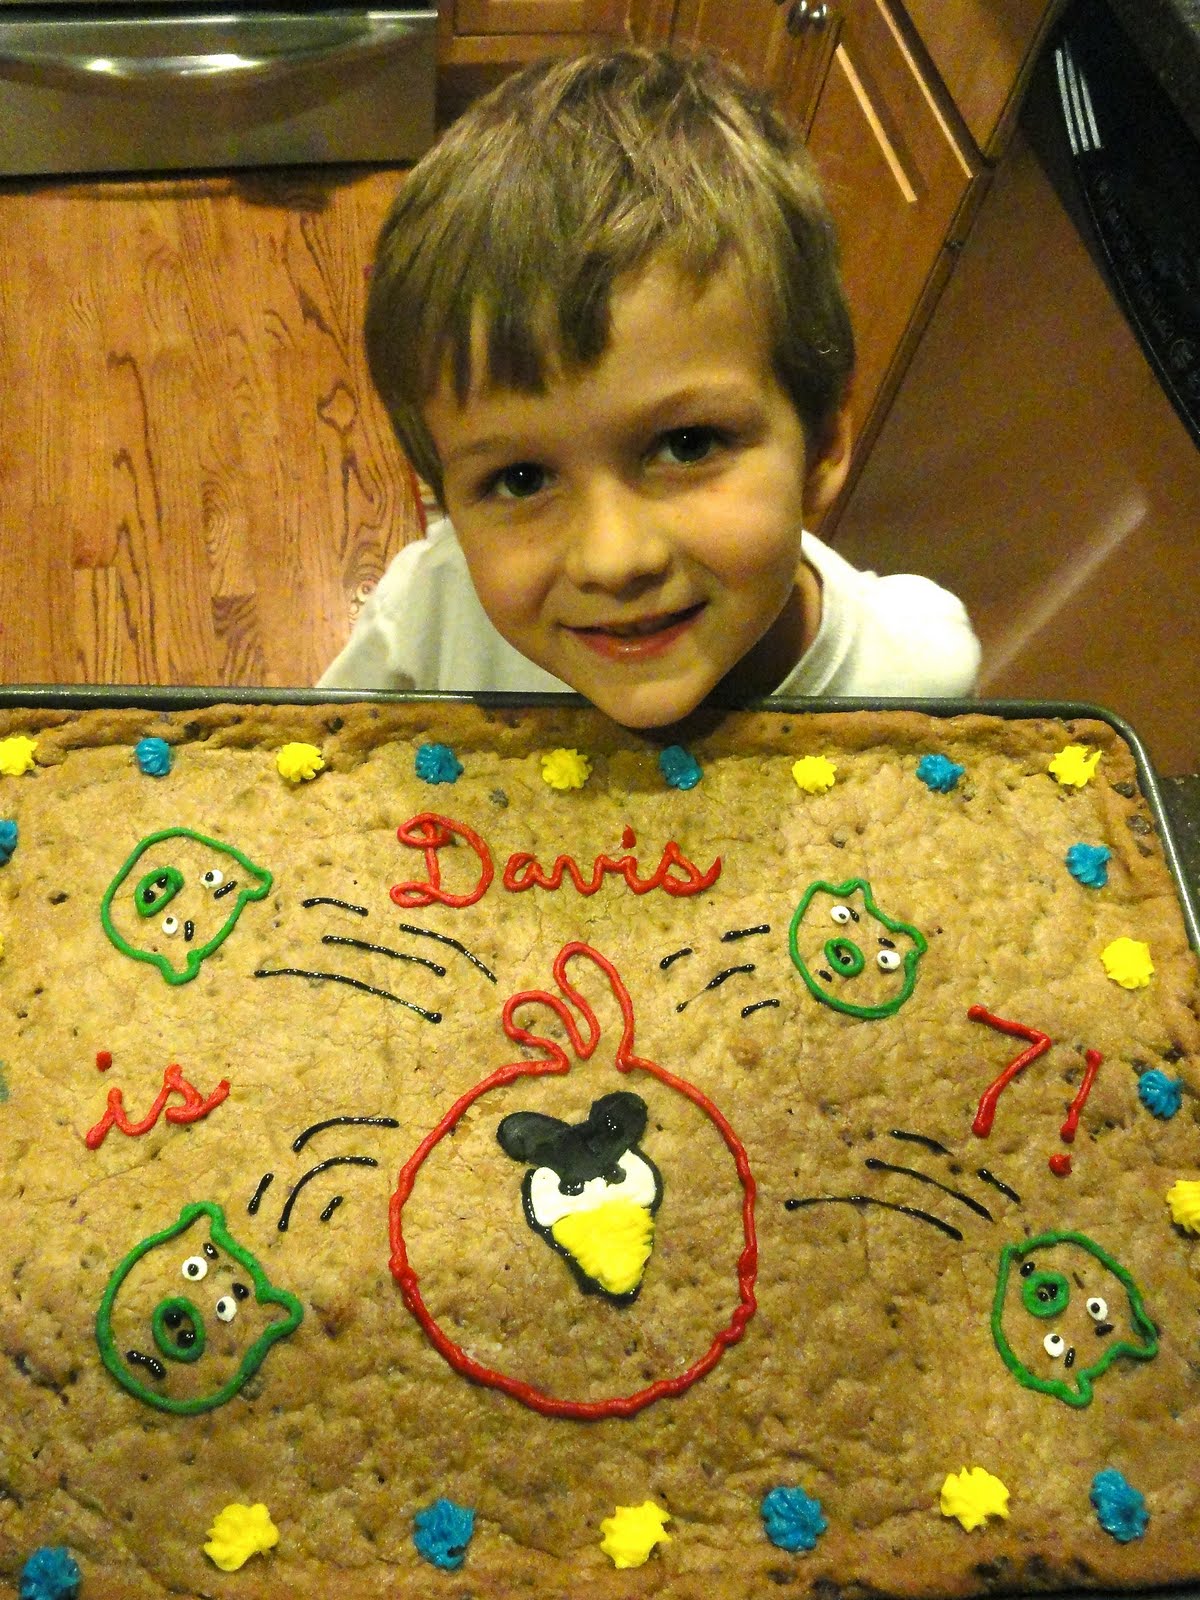
 [the cookie cake I made for him to take to school]
 [the Angry Birds he made with his friends at school, used as decoration]
[playing Angry Birds on my iPhone while waiting for pizza]
 [Pigs]
 [Pigs & structure.]
 [Pigs & structure all lit up for the occasion. Yes, the pig front & center had already lost an eyeball, which actually made it even more like the game. :)]
[Angry Peep close up. I feel bad for the actual Peep underneath that disguise.]

This winter while Brett played basketball, Davis could be found with us in the bleachers. Sometimes he would go off & sit with friends ... and apparently take turns playing a game with his friends on his friends' parents' phones. He wanted me to get the game on my phone & luckily my old school phone didn't have the capabilities. :) He would come home from school with drawings of these weird birds. I had no idea what they were. Sometimes there were green pigs. Even weirder. Then one day in February, I got an iPhone. I tried to keep it from the kids, but that didn't last long. The second Davis saw a smooth flat screen [no buttons!] on my phone, he KNEW it had the capabilities. For Angry Birds.

He's a fan and after my mom sent me a link to this Angry Bird Birthday Cake video, we agreed Davis would love it. We also agreed that slaving over cake ... probably wasn't necessary. I told my mom "I'm thinking ... NUTTY BARS". I was going to make cake balls for both the birds & pigs, but then saw this version using donut holes via Meg's Whatever blog. Sweet. Taking shortcuts where you can & it really won't matter - that's my style. So I was off to the grocery store where after staring at all the items in the sugar aisle, I picked up:

2 boxes of donut holes, 5 tubes of icing, a bag of Laffy Taffy and M&Ms, a bottle of confetti sprinkles, a package of Peeps, white almond bark, a box of Nutty Bars & Fancy Cakes [those square white cakes].

I did the pigs 1st. Not pretty, but tasted good. After making just a handful of pigs, I was done with the white almond bark. So I looked at my Peeps & thought "let's see what we can do with you." A squirt of white icing there, some chocolate sprinkles here ... then I raided my sprinkle collection to find something orange. I found my Halloween mix which had pumpkins & bats. I used both ... pumpkin for the 'beak' & the bat for the tuft of hair on top. So ugly, so funny, so angry ... I felt so bad for the Peeps. They looked especially funny going back in their packaging. :) But they WORKED.

When it was time for dessert, I got out the Nutty Bars & Fancy Cakes ... and in less than a minute I had the structure built. Added the green pigs, grabbed the packages of Angry Peeps & a sling shot ... and headed outside. Davis was absolutely beside himself. I had kept it a surprise ... and it just got better when I told him he could shoot the Angry Peeps with the sling shot. A 7 year old's dream. I think it made his year.

It took awhile to get the knack of it, but those Peeps did indeed fly. I even got beamed in the eye with one while I was hovering behind the table taking pictures. And I think the bat sprinkle got me head on because it actually hurt. Well, more than just a regular Peep would ... but it was hilarious.  :) It was fun. So so so fun. And so so so worth it. When all the Peeps were either eaten or far too dirty to use [umm, yes. I may have let them reuse 1 or 2], we called 'game over' & dug into the sweets.  I think Davis will remember this Birthday long after the Angry Birds craze is over. :)

P.S. My incredibly talented friend Alissa has a Peeps blog & featured me today. :) Check it out.

1.24.2011

Comfort food ...


Love this print. Love the colors, the sketches, her handwriting.
Found here from dawntanwenyi.

Yesterday, I made the ultimate comfort food.  I made this cheddar beer bread again, paired with this recipe for Pioneer Woman's Beef Stew with Paprika.
YOU GUYS.
[no words.  just make it.  the both of them - together.]

10.06.2010

Granola goodness ...


Yesterday I made a double batch of granola.  Dana posted a link to a recipe on her blog a couple weeks ago & I got to thinking about it ... then a friend & I were talking about flaxseed & I got to thinking about it. Then I realized that Wednesday of this week [today] was Teacher Appreciation Day at school ... in honor of F.I.R.E.  I'm sure something was done on a grander scale, but I wanted to take a little extra gift to Brett's classroom teacher, para, & resource teacher for all the extra love.

My mom made this recipe 7 years ago when I was home visiting from Florida (I remember it because I was pregnant with little Davis).  I was in heaven.  I did crack my tooth on something in it, however, so I've been leery to try it again.  :)  But ... it was just as good as I remembered, if not better.

RECIPE for HOMEMADE GRANOLA:
Bake @ 300 degrees for 1 hour
Makes 9 cups
Serve with milk for breakfast or just by itself for a snack.

4 c. old-fashioned oats (11oz)
1/2 cup flaked coconut (I found some unsweetened coconut chips in the health food area)
1 c. sliced almonds (4oz)
1/2 c. unsalted sunflower seeds
1/4 c. whole flaxseed
1/2 c. firmly packed light brown sugar
1 tsp. salt
1 tsp. cinnamon
1/2 c. vegetable oil
1/2 c. water
2 Tblspn. honey
1 tsp. vanilla
1 c. raisins
1 c. "Craisins" (I used the cherry infused Craisins ... highly recommend them!!!) or other dried fruit


1. Preheat oven to 300 degrees.  Lightly grease 15 1/2 x 10 1/2 x 1 inch jelly roll pan (I used parchment paper!!!!).
2. Combine dry ingredients (but not any of the dried fruit!).
3. In small bowl, whisk together oil, water, vanilla & honey.  Pour over oat mixture.  Mix well.  Spread mixture evenly in prepared jelly roll pan.
4. Bake at 300 degrees for 1 hour, stirring every 15 minutes, until mixture is golden brown & slightly crunchy.  Cool in pan on wire rack.  Stir in raisins & other dried fruit.  Store in an airtight container.


I know stirring every 15 minutes may sound high-maintenance.  But trust me ... the smell that comes from getting to open your oven door every 15 minutes is well worth the effort.  Make some.  Take some to a teacher for a Fall treat; mail some to a friend whose husband is deployed; pair it with a Snuggie for a Birthday gift.  That's where all mine went anyway.  :)  [I don't think my friend is a blog reader, so it'll still be a surprise]


Make some ... & make some days while you're at it!  :)  I already have plans for making another batch next week.  [What else am I going to do with all that flaxseed?]  
[* I put them in gallon size Ziploc bags, inside of lunch bags.
Made one gift tag & one tag listing the ingredients
- just for food allergy purposes.  And curiosities. :)]

7.12.2010

Soft Pretzels ...

Davis pointed out that it looked like a little face smiling... :)

If you got married around the Turn of the Millennium you have a Bread Maker [Or 2 :)].  Or you had one [but you have already gotten rid of it because you never used it].  I still use mine.  I love it mainly for making dough of all sorts & last week I tried out the recipe for making soft pretzel dough.  I thought they'd be fun to make with the boys, but it turned out I had to do most of the work since it involved a pot of boiling water [I didn't know that until I got to that part of the recipe].  But they were still fun to make & every step of the long & involved process is just part of what makes them taste ... PERFECT.  [Recipe from the Oster Bread Maker booklet that came with the machine]

DOUGH:
1 cup plus 2 Tbl water
1 Tbl vegetable oil
3 cups flour
1 tsp salt
1Tbl sugar
2 1/2 tsp regular active dry / bread machine / quick-acting active dry yeast [pick one]

TOPPING:
3 Tbl salt
1 Tbl water
1 egg white
Coarse salt or sesame seed

DIRECTIONS:
1. Place all dough ingredients in bread pan in the order listed.  Select dough cycle & press start.
2. [After dough is done] Cut dough into 15 pieces; cover with towel to prevent drying.  Roll each piece into 15-inch rope.  Twist each rope into pretzel shape.  Cover; let rise in warm place 20-25 minutes or until almost double.
3. Heat oven to 375.  Generously grease cookie sheet.  Dissolve 3 Tbl salt in 2 quarts boiling water.  Lower 3 or 4 pretzels at a time into boiling water, top sides down.  Boil 2 minutes, turning once.  Remove with slotted spoon to paper towels; let stand a few seconds, then place 1/2 inch apart on cookie sheet.
4. Beat 1 Tbl water & the egg white; brush over pretzels.  Sprinkle lightly with coarse salt.  Bake 20-24 minutes or until light golden brown.  Remove from cookie sheet.  Cool on wire rack.

Next time I'll get more creative with the toppings ... like garlic & rosemary [for me] or jalapeƱo & cheddar [for Kyle].  :)  Mmm Mmm...

6.15.2010

Raspberry Ribbons ...


Yesterday I tried out a cookie recipe that I've had in my accordion recipe file for years.  I had to make dinner for a family & wanted to make something unique for dessert.   They really were so good & were a nice change up.  Something different.  :) I doubled the ingredients so that we could enjoy them, too.  :) And by the way, the dough is to die for [I'm a sucker for that salty sweet taste] ... in case you're tempted to sneak a taste.  I wouldn't call my tastes "sneaking" ... I purposely left a nice sizable 'taste' of the dough in the bowl.  :)  Not exactly a "taste" or a "sneak" by any means.  :) Yum.  I made just a couple small changes which I have written in italics.

Raspberry Ribbons:
1 cup butter [no substitutes], softened
1/2 cup sugar
1 egg
1 teaspoon vanilla extract
2-1/4 cups all-purpose flour
1/2 teaspoon baking powder
1/4 teaspoon salt
1/2 cup raspberry jam

Glaze:
1 cup confectioners' sugar
2 tablespoons evaporated milk [I used regular milk.]
1/2 teaspoon vanilla extract

In a mixing bowl, cream butter & sugar.  Beat in egg & vanilla.  Combine the flour, baking powder & salt; gradually add to creamed mixture & mix well.  Divide dough into 4 portions; shape each into a 10-in. x 2-1/2-in. log.  Place 4 inches apart on greased or parchment paper lined baking sheets.

Make a 1/2-in. depression [I used my index finger] down the center of each log.  Bake at 350 degrees for 10 minutes.  Fill depressions with jam.  Bake 10-15 minutes longer or until lightly browned.  Cool for 2 minutes.  Remove to a cutting board; cut into 3/4-in. slices.  Place on wire racks.  Watch out sneaking bites at this point - yowzers that jam is HOT.

In small bowl, combine glaze ingredients until smooth. I put 1 drop of red food coloring in the glaze to make it pink since I actually used a black raspberry jam &  I didn't have that pretty red jam color!  But the white glaze with red jam is pretty, too, I'm sure!  :)  Drizzle over warm cookies.  Cool completely.

They taste as good as they look!  :) Hmm ... wonder if you used red jam & dyed the glaze a light blue if they'd be pretty for the 4th of July?  Again ... it'd be something different.  You know instead of everyone's favorite cool whip topped cake with the berry-made American flag.  :)  Hmm ... might have to try this again next month.

3.03.2010

Rainbow Cookies


I got this recipe about 6-7 years ago. I kept getting these packs of free recipe cards mailed to me from Creative Cook's Kitchen ... they were hoping to get me to buy into their monthly recipe program (and you got a binder to put all the recipes in, etc.). Never bought into the program ... but I do treasure some of the freebies I got. This is one recipe card that has been in my accordion file all those years ... just waiting 'til I could use it.

I think Libby's Birthday treats for school is a perfect occasion. :)

R a i n b o w C o o k i e s

1 cup [2 sticks] butter or margarine, softened
2 cups sugar
2 large eggs
1 1/2 tsp vanilla extract
1/2 tsp almond extract
4 1/2 cups all-purpose flour
1 tablespoon baking powder
1/4 tsp salt
red, yellow, green & blue food coloring paste or gel
1 cup prepared vanilla frosting

1. In a large bowl, using an electric mixer set on medium speed, beat butter & sugar until fluffy. With mixer on low speed, beat in eggs, vanilla & almond extracts. Beat in flour, baking powder & salt until a dough forms. [*Mine was the consistency of sand ... so I added milk little by little until I could work with it ... but don't make it too wet.]

2. Measure 1/4 cup dough; knead in red food coloring until desired color is reached. Roll into a 5-inch log.

3. Measure 1/2 cup dough; knead in yellow food coloring. Roll dough into a 5- x 3 1/2-inch rectangle; use a ruler to keep the corners square. [*Ruler? I just used my hands & patted it in place.] Place red log in center; fold yellow dough around log. Pinch to seal (do not overlap edges). Roll to form a smooth 5-inch log.

4. Measure 3/4 cup dough; knead in green food coloring. Roll dough into a 6- x 5-inch rectangle. Place log in center; fold green dough around log. Pinch to seal; roll to form a 5-inch log.

5. Measure 1 cup dough; knead in blue food coloring. Roll into a 8 1/2- x 5-inch rectangle. Place log in center; fold blue dough around log, pinching to seal edges. Roll to form a smooth log; wrap in waxed paper. Freeze until firm, about 1 hour, rolling log every 15 minutes. [*Basically, the amount of time it takes to make the clouds... works out nicely.]

6. Preheat oven to 350F. Grease 3 baking sheets. Roll remaining dough to a 1/4-inch thickness. Use a scalloped flower cookie cutter to cut clouds.

7. Transfer cloud cookies to prepared baking sheets; bake for 8 minutes. Transfer cookies to wire racks to cool.

8. Cut log in half lengthwise along seam; cut each half into 15 slices.

9. Bake cookies about 10 minutes. Let cool. Frost clouds with vanilla frosting; place a rainbow cookie on each. Sprinkle with nonpareils or sugar crystals; let stand to set frosting.

*Note off to the side: If you're short on time, use refrigerated cookie dough. For the amount of dough needed in this recipe, use 2 packages (18 oz each) sugar cookie dough mixed with 1 cup flour.

*Variations: Pot of gold (gold foiled candy) at the end of the rainbow, all placed on top of a cupcake ... St.Patrick's Day!

1.26.2010

Chocolate Zucchini Cake

Libby and I made a yummy cake the other day. SO GOOD. And so much zucchini in there, it's pretty good FOR you. You know ... for being a chocolate cake. :)

1 3/4 c. sugar
1/2 c. vegetable oil
2 eggs
2 1/2 c. flour
1/2 t. baking powder
4 T cocoa powder
1 t. salt
1/2 t. cinnamon
1/2 c. buttermilk or sour milk [I did 1/2 c. milk + 3/4 t. cream of tartar]
1 T vanilla
2 c. grated zucchini
1 c. semi-sweet chocolate chips [optional]

Cream sugar and vegetable oil together in large bowl. Add eggs. Sift dry ingredients together. Add alternately with milk. Add zucchini and vanilla. Beat well. Pour into a greased & floured bundt pan. Sprinkle 1 cup of chocolate chips over the top before baking. 350 degree oven, 40 minutes or until done [mine took more like 60 minutes]. Sprinkle with powdered sugar before serving!

So so so good. And the fact that there's zucchini in there really can be a secret. I know the picture of the batter smothered in shredded zucchini doesn't look very appetizing ... but after it baked, there was hardly a green fleck to be found. But leave it to Brett. He found it. Although, I think if I wouldn't have mentioned the "Z" word, he wouldn't have been looking. :) ha ha