

Thought I'd make up for the long blog break with a long post that will take you 2 days to read! This will also explain what I've been busy with the past couple of weeks - when we weren't spending a week in Orlando doing the Disney thing! :)
So the make over started when we inherited this buffet [below]. We did what I call "Musical Dressers" - sort of like "Musical Chairs", but with dressers: this one goes here, this one goes there, that will go there ... and that [changing table / dresser] will get listed on Craigslist & sold that same morning to a lovely couple who will turn it into a TV cabinet! :)
We got the buffet from Kyle's parents. The storage was great, we had space in our dining room for it, but the finish wouldn't work. It was way too formal for my dining room and for my personal taste. It was cherry & glossy. We are not a formal family & we have a unique set up for a dining room ... it is an extension of the kitchen. It is where we eat daily - not just on holidays. It is also where we do puzzles, do homework & carve pumpkins. In other words, this room has to be casual enough for daily use, but fancy enough to host Thanksgiving dinner.

Buffet before with its cherry finish. If you have an aversion to sanding & painting furniture, you can end here. Otherwise ... continue. :)

Sanding. Lots & lots of sanding. Not a good idea probably if just a week ago you were diagnosed with bronchitis - but I was vigilant with cleaning up the sawdust [see the vacuum?]. A palm sander comes in handy for this part.

Rookie mistake ... I should have primed it. I tried to get out of it. I painted 2-3 good coats before I surrendered & got out the primer. Don't make this mistake. Prime first. As you can see, what was left of the stain bled through.

Then paint. I did a combo of roll & brush. This is freak-a-zoid Libby sneaking into the photo. She gets her freak-a-zoid-ness mostly from me, but her mad photo-sabotage skills from her daddy. She's the best of both worlds! :)
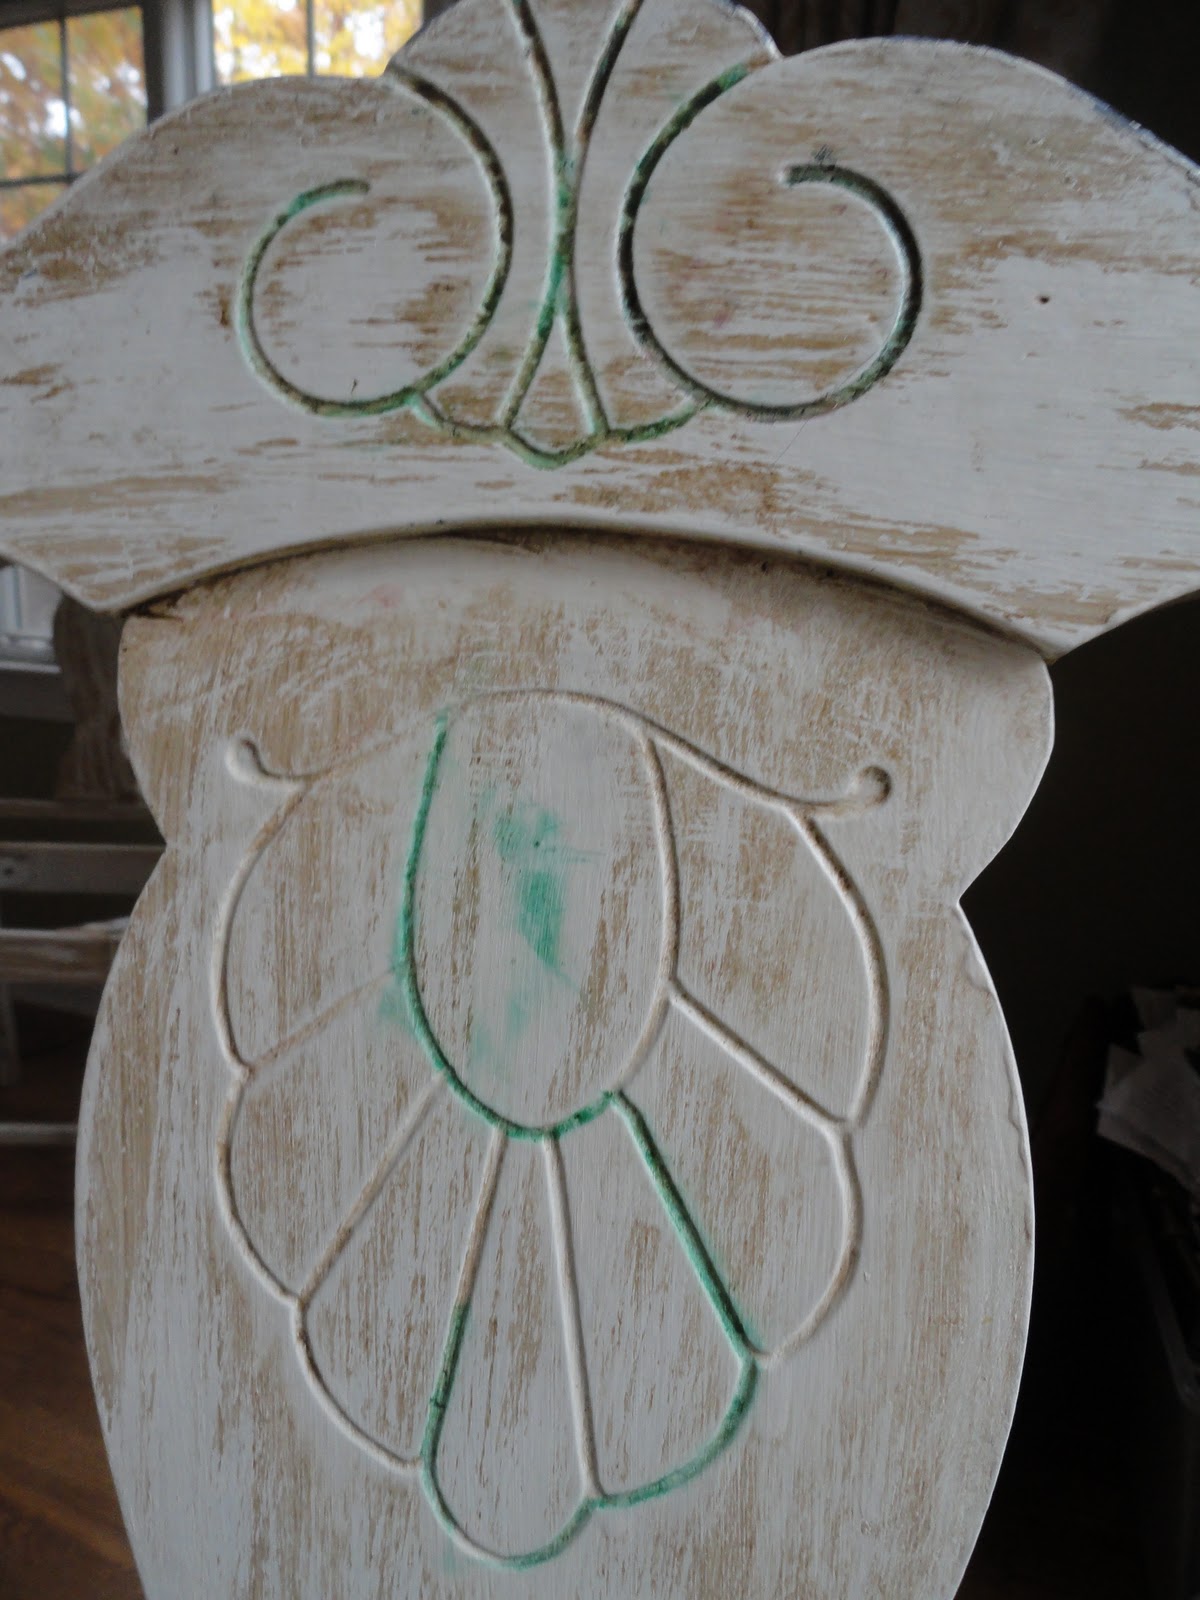
Next up on the redo list were my 6 dining room chairs. They had been painted cream right after I got them, but I had never sanded them. I had just primed & painted over the gloppy country blue. Then when we lived in Corpus Christi our kitchen had a little Spanish style thing going, so just for fun I had rubbed some antiquing glaze on the chairs. Between that & a little freak-a-zoid tracing green marker into the crevices of one of the chairs [see? Told you we're casual], it was time to give them a makeover as well.

I sanded all 6 chairs down, made repairs where needed, then gave them all a fresh coat before screwing the seats back in.

I left the table for last. It had been painted a few years ago, but I wanted to give it a little more attention this time around. [Two years ago I did this post where I had just painted the table. I also wrote about it here where you can see the before photos of both the table & chairs!] There were a couple cracks that I filled with wood putty, then sanded down before painting.
Ready for its close-up ... but still had one more thing I wanted to do before putting all my supplies away.

In the background, you'll see Davis who while playing games on my iPhone, was there for [an incredible amount of] moral support. But in the foreground, you'll see a pine board getting prepped. The day I bought this table [summer of ... '02?], I told myself one day I'd make a leaf or 2. Only took me about 9 years to do that project. And to think it only took about an hour & a 1/2 to do it. :) Took my measurements to the hardware store & had them cut down a pine 1"x12"x6' board to the width of the table. It cost me just over $7. I already had a wooden dowel [from other projects] that I had tested out in the already existing holes in the table. I believe it was the 3/4" [diameter] size.

The table came with 2 or 3 little pegs [but no leaves, they had been lost ] so I used the originals to make more.

I made more than I needed just to have a few extra & stored them in a drawer of the buffet. I just used a jigsaw to cut the dowel into approx 1.5" pieces, then sanded down the edges. They aren't perfect, but work perfectly fine!

Original holes, new pegs!

This next part made me nervous. Very nervous. I wasn't sure how to make the holes in the accurate spots. At first, I marked the ends of the dowel pegs with blue chalk, to see if they'd leave a perfect circle onto the pine board when butted up next to each other. They didn't. So then I traced it with a pencil, which wasn't perfect either. So I used the combination of pencil & chalk markings to guesstimate where I needed to drill.

Then held my breath & breathed again when it all fit together like a glove. Awesome. Old table from [we think?] the 1930's with some new accessories made for it in 2011. You just gotta love that.

Above is a pic of the table with the new leaf in place, all primed & painted. We don't have enough chairs to do this, but if needed, we can squeeze 3 chairs on one side now.

Finished. Less than 2 days before I hosted a Thanksgiving dinner.

The leaf helped us to spread out, which I think when it's 6 adults [kiddies had their own table], it's kind of nice to be able to do. Love love love. So so happy.

And since that last photo was right next to this one in iphoto, I couldn't help but put this one in of our Thanksgiving turkey [recipe found here]. I love trying out new recipes & thought with 200 reviews, a 5 star rating & a blanket of bacon, it was hard to go wrong. :) Hope you & yours had a wonderful Thanksgiving!
3 comments:
looks awesome, rach! loved how you set the table for turkey day! i spotted those lil' turkey s&p shakers you had told me about..soo cute! table/chair/leaf look GREAT!!!!! and that turkey looks amaze-balls. must try when i host one day:)
Looks great! I will have to try the bacon trick one of thaws days! That gold table cloth looks fabulous!
I am extremely impressed. Whenever we move (our house is for sale) we will inherit my parents old dining room furniture. Its what I would call 90s formal...glossy, cherry and wicker trim. U-G-L-Y. I will 100% be soliciting your opinion on how to redo it and make it look like something out of Pottery Barn. Because obviously you can do some really impressive transformations! And you put bacon on the turkey - AMAZING!
Post a Comment